
You love the great outdoors for the jaw-dropping sceneries. Whether it’s hiking a familiar trail in the backwoods or backpacking in a famous national park, you feel most alive when you’re communing with nature. Indeed, nothing quite compares to a view of rugged peaks from a high vantage point, especially during sunrise and sunset.
Unsurprisingly, you’d want to capture your experiences through photography. Follow these actionable tips, and you’ll soon be taking mountain photographs that fascinate and inspire.

1. Explore the road less travelled
Many novice mountain photographers want to recreate the iconic images they’ve seen in art books and postcards. As a result, many swarm the same iconic spots in national parks, hoping to recreate or even surpass those famous images by well-known photographers.
To avoid capturing an image that’s been photographed numerous times, consider going off the beaten path. Whether it’s walking away from established viewpoints to explore different ones or trekking for days in the wilderness until you come across a refreshing view, avoid what others are doing and you’ll be rewarded with unique and creatively stimulating images.
2. Pack the right photography gear
Your spine isn’t made of steel—backpacking for days in the wilderness means you cannot bring all your favorite photography gear. Travel light by focusing on these essentials:
- Cameras and Lenses
Bring a DSLR or a mirrorless camera with you. You can also bring a backup camera in case your primary camera malfunctions. While you might be tempted to bring an array of lenses to capture every imaginable scenario, it’s important to narrow your choices down to two. Bring a wide-angle lens to capture panoramic mountain shots as well as a zoom lens to capture sharp details. If you’ll bring longer or heavier lenses, bring also a lightweight travel tripod to support the extra weight.
- UV and Polarizing Filters
A UV filter will protect not only your lenses from the elements but also your lenses’ glass and coating from harmful ultraviolet light, which is usually high in mountainous areas, especially when it’s sunny.
You should also bring a polarizing filter to minimize glare, manage reflections, and darken skies. A polarizing filter will come in handy when you’re photographing the surface of a lake, or if it’s sunny or if there’s lots of snow.
- Graduated Neutral Density Filter
Light doesn’t hit the landscape high in the mountains evenly. A ridge can be cast in shadow even if the sky above it is bright. When capturing this image, either the sky has to be blown out or you must lose shadow detail in the mountains because the dynamic range isn’t high enough in most cameras.
This makes a graduated neutral density (GND) filter absolutely necessary for mountain photography. Let’s say you’re photographing a landscape with a bright sky, and the bottom half is cast in shadow. With a GND filter over the front of your lens (the dark part at the top and the light part at the bottom), the bright sky will be darkened while the bottom of your shot will be exposed properly. This way, you’ll photograph a scene that’s evenly exposed, and all the details will be visible.
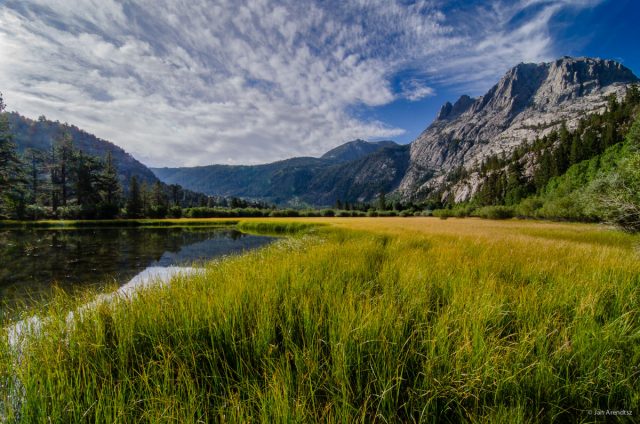
3. Use an interesting foreground
In many landscape shots, the subject—such as a mountain range or ravine—is far away and there’s nothing to look at in the foreground. This creates a lack of depth.
Add an interesting element to your foreground to make your photograph more captivating and to create a 3D feel. When photographing a stunning vista, pay attention to objects in the foreground like grass, rocks, plants, or even puddles of water.
4. Capture distance and height and take panoramic shots
When shooting from a mountainside or summit, you can emphasize distance and height. Use a wide-angle lens and include an object in the foreground to anchor the composition. Lenses wider than 24mm can be used, though the emphasis on height and distance is lessened the wider your lenses are.
Capture the splendor of the mountain range or nearby peaks by taking a panoramic shot with a wide-angle lens. This will help the viewer appreciate the scale of the location (though a panoramic shot generally doesn’t emphasize the dramatic height of mountains).
-
by
